

 弊社は製品に自信を持っており、面倒な製品を提供していません。


あなたはCKS学習資料の更新をどのぐらいでリリースしていますか?
すべての学習資料は常に更新されますが、固定日付には更新されません。弊社の専門チームは、試験のアップデートに十分の注意を払い、彼らは常にそれに応じて試験内容をアップグレードします。
割引はありますか?
我々社は顧客にいくつかの割引を提供します。 特恵には制限はありません。 弊社のサイトで定期的にチェックしてクーポンを入手することができます。
あなたのテストエンジンはどのように実行しますか?
あなたのPCにダウンロードしてインストールすると、Linux Foundation CKSテスト問題を練習し、'練習試験'と '仮想試験'2つの異なるオプションを使用してあなたの質問と回答を確認することができます。
仮想試験 - 時間制限付きに試験問題で自分自身をテストします。
練習試験 - 試験問題を1つ1つレビューし、正解をビューします。
Linux Foundation CKS 認定試験の出題範囲:
| トピック | 出題範囲 |
|---|---|
| トピック 1 |
|
| トピック 2 |
|
| トピック 3 |
|
参照:https://training.linuxfoundation.org/certification/certified-kubernetes-security-specialist/#exams
返金するポリシーはありますか? 失敗した場合、どうすれば返金できますか?
はい。弊社はあなたが我々の練習問題を使用して試験に合格しないと全額返金を保証します。返金プロセスは非常に簡単です:購入日から60日以内に不合格成績書を弊社に送っていいです。弊社は成績書を確認した後で、返金を行います。お金は7日以内に支払い口座に戻ります。
CKSテストエンジンはどのシステムに適用しますか?
オンラインテストエンジンは、WEBブラウザをベースとしたソフトウェアなので、Windows / Mac / Android / iOSなどをサポートできます。どんな電設備でも使用でき、自己ペースで練習できます。オンラインテストエンジンはオフラインの練習をサポートしていますが、前提条件は初めてインターネットで実行することです。
ソフトテストエンジンは、Java環境で運行するWindowsシステムに適用して、複数のコンピュータにインストールすることができます。
PDF版は、Adobe ReaderやOpenOffice、Foxit Reader、Google Docsなどの読書ツールに読むことができます。
更新されたCKS学習資料を得ることができ、取得方法?
はい、購入後に1年間の無料アップデートを享受できます。更新があれば、私たちのシステムは更新された学習資料をあなたのメールボックスに自動的に送ります。
ShikenPASSはどんな学習資料を提供していますか?
テストエンジン:CKS試験試験エンジンは、あなた自身のデバイスにダウンロードして運行できます。インタラクティブでシミュレートされた環境でテストを行います。
PDF(テストエンジンのコピー):内容はテストエンジンと同じで、印刷をサポートしています。
購入後、どれくらいCKS学習資料を入手できますか?
あなたは5-10分以内にLinux Foundation CKS学習資料を付くメールを受信します。そして即時ダウンロードして勉強します。購入後に学習資料を入手しないなら、すぐにメールでお問い合わせください。
Linux Foundation Certified Kubernetes Security Specialist (CKS) 認定 CKS 試験問題:
SIMULATION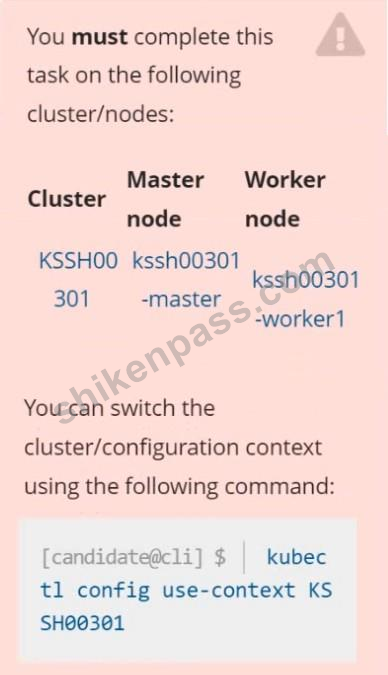
Task
Create a NetworkPolicy named pod-access to restrict access to Pod users-service running in namespace dev-team.
Only allow the following Pods to connect to Pod users-service:
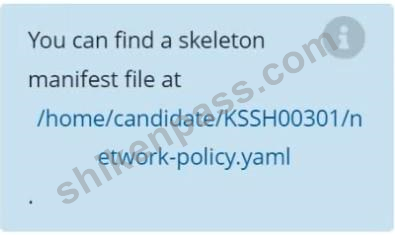
正解:


SIMULATION
Context
You must fully integrate a container image scanner into the kubeadm provisioned cluster.
Task
Given an incomplete configuration located at /etc/kubernetes/bouncer and a functional container image scanner with an HTTPS endpoint at https://smooth-yak.local/review, perform the following tasks to implement a validating admission controller.
First, re-configure the API server to enable all admission plugin(s) to support the provided AdmissionConfiguration.
Next, re-configure the ImagePolicyWebhook configuration to deny images on backend failure.
Next, complete the backend configuration to point to the container image scanner's endpoint at https://smooth-yak.local/review.
Finally, to test the configuration, deploy the test resource defined in /home/candidate/vulnerable.yaml which is using an image that should be denied.
You may delete and re-create the resource as often as needed.
The container image scanner's log file is located at /var/log/nginx/access_log.
正解:
See the Explanation below for complete solution
Explanation:
Below is the CKS exam style "do-this-exactly" runbook for Q3. It includes the minimal discovery commands (so you don't guess filenames), then the exact lines/blocks to set.
QUESTION 3 - ImagePolicyWebhook (Validating Admission) - Exam Steps
0) SSH + root
ssh cks000002
sudo -i
1) Identify the provided config files (no guessing)
ls -la /etc/kubernetes/bouncer
You are looking for files typically named like:
admission_configuration.yaml (AdmissionConfiguration)
imagepolicywebhook.yaml (ImagePolicyWebhookConfiguration) OR the ImagePolicyWebhook config embedded inside the AdmissionConfiguration kubeconfig (webhook kubeconfig) If unsure which is which, quick peek:
grep -R "ImagePolicyWebhook" -n /etc/kubernetes/bouncer
grep -R "AdmissionConfiguration" -n /etc/kubernetes/bouncer
grep -R "kubeconfig" -n /etc/kubernetes/bouncer
PART A - Reconfigure API Server to enable required admission plugin(s)
2) Edit API server static pod manifest
vi /etc/kubernetes/manifests/kube-apiserver.yaml
2.1 Enable the admission plugin ImagePolicyWebhook
Find the line starting with:
- --enable-admission-plugins=
Ensure ImagePolicyWebhook is included in that comma list.
Example (your list may differ; just add ImagePolicyWebhook):
- --enable-admission-plugins=NodeRestriction,ImagePolicyWebhook
If the flag does not exist, add one line under command::
- --enable-admission-plugins=ImagePolicyWebhook
2.2 Point API server to the provided AdmissionConfiguration
In the same file, ensure this flag exists (use the file in /etc/kubernetes/bouncer that contains AdmissionConfiguration):
- --admission-control-config-file=/etc/kubernetes/bouncer/admission_configuration.yaml If your file is named differently, use the real filename you found in step 1, but keep the flag name exactly --admission-control-config-file.
Save/exit:
:wq
Static pod will restart automatically (kubelet watches the manifest).
Optional quick watch:
docker ps | grep kube-apiserver
# or:
crictl ps | grep kube-apiserver
PART B - Configure ImagePolicyWebhook to deny images on backend failure
3) Edit the ImagePolicyWebhook config
One of these is true on your cluster:
Option 1 (most common in these tasks): ImagePolicyWebhook config is a standalone file Edit the file in /etc/kubernetes/bouncer that contains kind: ImagePolicyWebhookConfiguration:
grep -R "kind: ImagePolicyWebhookConfiguration" -n /etc/kubernetes/bouncer vi /etc/kubernetes/bouncer/<THE_FILE_YOU_FOUND>.yaml Set (or ensure) exactly:
defaultAllow: false
Option 2: ImagePolicyWebhook config is embedded inside AdmissionConfiguration Edit the AdmissionConfiguration file:
vi /etc/kubernetes/bouncer/admission_configuration.yaml
Find the plugin section for ImagePolicyWebhook and ensure the config includes:
defaultAllow: false
✅ Save/exit:
:wq
PART C - Point backend configuration to https://smooth-yak.local/review
4) Edit the webhook kubeconfig to use the scanner endpoint
Find the kubeconfig file referenced by the ImagePolicyWebhook config.
Search for kubeConfigFile:
grep -R "kubeConfigFile" -n /etc/kubernetes/bouncer
Open that kubeconfig path (example name below; yours may differ):
vi /etc/kubernetes/bouncer/kubeconfig
In kubeconfig, set the cluster server exactly:
clusters:
- cluster:
server: https://smooth-yak.local/review
✅ Save/exit:
:wq
PART D - Restart effect (make sure API server picks up config)
Because you already edited /etc/kubernetes/manifests/kube-apiserver.yaml, the API server restarted.
To be safe (and fast), force a restart by "touching" the manifest (no content change needed):
touch /etc/kubernetes/manifests/kube-apiserver.yaml
PART E - Test: apply vulnerable workload and confirm it is denied
5) Use admin kubeconfig (because old kubectl config may break)
export KUBECONFIG=/etc/kubernetes/admin.conf
kubectl get nodes
6) Deploy the test resource (should be DENIED)
kubectl apply -f /home/candidate/vulnerable.yaml
Expected: admission error/denied message.
If it already exists:
kubectl delete -f /home/candidate/vulnerable.yaml
kubectl apply -f /home/candidate/vulnerable.yaml
PART F - Verify the scanner was called (log check)
7) Check scanner access log
tail -n 50 /var/log/nginx/access_log
You should see requests hitting /review.
Quick "what to check if it doesn't deny"
Run these in order:
Confirm API server flags:
grep -n "enable-admission-plugins" /etc/kubernetes/manifests/kube-apiserver.yaml grep -n "admission-control-config-file" /etc/kubernetes/manifests/kube-apiserver.yaml Confirm deny-on-failure:
grep -R "defaultAllow" -n /etc/kubernetes/bouncer
Must show:
defaultAllow: false
Confirm endpoint:
grep -R "server: https://smooth-yak.local/review" -n /etc/kubernetes/bouncer API server logs (docker runtime):
docker ps | grep kube-apiserver
docker logs $(docker ps -q --filter name=kube-apiserver) --tail 80
If you paste the output of:
ls -/etc/kubernetes/bouncer
grep -R "kind: AdmissionConfiguration" -n /etc/kubernetes/bouncer
grep -R "ImagePolicyWebhook" -n /etc/kubernetes/bouncer
SIMULATION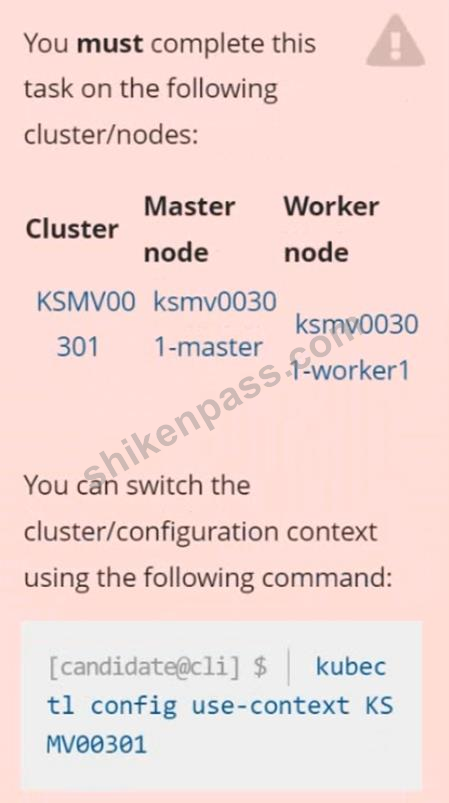
Context
This cluster uses containerd as CRI runtime.
Containerd's default runtime handler is runc. Containerd has been prepared to support an additional runtime handler, runsc (gVisor).
Task
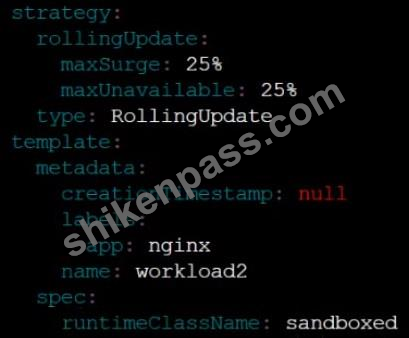
Create a RuntimeClass named sandboxed using the prepared runtime handler named runsc.
Update all Pods in the namespace server to run on gVisor.
正解:
See the Explanation below
Explanation:




SIMULATION
Enable audit logs in the cluster, To Do so, enable the log backend, and ensure that
1. logs are stored at /var/log/kubernetes-logs.txt.
2. Log files are retained for 12 days.
3. at maximum, a number of 8 old audit logs files are retained.
4. set the maximum size before getting rotated to 200MB
Edit and extend the basic policy to log:
1. namespaces changes at RequestResponse
2. Log the request body of secrets changes in the namespace kube-system.
3. Log all other resources in core and extensions at the Request level.
4. Log "pods/portforward", "services/proxy" at Metadata level.
5. Omit the Stage RequestReceived All other requests at the Metadata level
正解:
Kubernetes auditing provides a security-relevant chronological set of records about a cluster. Kube-apiserver performs auditing. Each request on each stage of its execution generates an event, which is then pre-processed according to a certain policy and written to a backend. The policy determines what's recorded and the backends persist the records.
You might want to configure the audit log as part of compliance with the CIS (Center for Internet Security) Kubernetes Benchmark controls.
The audit log can be enabled by default using the following configuration in cluster.yml:
services:
kube-api:
audit_log:
enabled: true
When the audit log is enabled, you should be able to see the default values at /etc/kubernetes/audit-policy.yaml The log backend writes audit events to a file in JSONlines format. You can configure the log audit backend using the following kube-apiserver flags:
--audit-log-path specifies the log file path that log backend uses to write audit events. Not specifying this flag disables log backend. - means standard out
--audit-log-maxage defined the maximum number of days to retain old audit log files
--audit-log-maxbackup defines the maximum number of audit log files to retain
--audit-log-maxsize defines the maximum size in megabytes of the audit log file before it gets rotated If your cluster's control plane runs the kube-apiserver as a Pod, remember to mount the hostPath to the location of the policy file and log file, so that audit records are persisted. For example:
--audit-policy-file=/etc/kubernetes/audit-policy.yaml \
--audit-log-path=/var/log/audit.log
SIMULATION
Context
You must implement auditing for the kubeadm provisioned cluster.
Task
First, reconfigure the cluster 's API server, so that:
. the basic audit policy located at
/etc/kubernetes/logpolicy/audit-policy.yaml is used,
. logs are stored at /var/log/kubernetes/audit-logs.txt,
. and a maximum of 2 logs are retained for 10 days.
The cluster uses the Docker Engine as its container runtime . If needed, use the docker command to troubleshoot running containers.
The basic policy only specifies what not to log.
Next, edit and extend the basic policy to log:
. namespaces interactions at RequestResponse level
. the request body of deployments interactions in the namespace webapps
. ConfigMap and Secret interactions in all namespaces at the Metadata level
. all other requests at the Metadata level
Make sure the API server uses the extended policy.
Failure to do so may result in a reduced score.
正解:
See the Explanation below for complete solution
Explanation:
1) Connect to the correct host
ssh cks000028
sudo -i
(If hostname differs in your exam, use the one shown in the question banner.)
2) Edit the API server static pod manifest
API server is a static pod in kubeadm.
vi /etc/kubernetes/manifests/kube-apiserver.yaml
3) Configure API server to enable auditing
Inside the command: section, ensure ALL of the following flags exist
(add them if missing, modify if present).
3.1 Use the given audit policy file
- --audit-policy-file=/etc/kubernetes/logpolicy/audit-policy.yaml
3.2 Store audit logs at the required location
- --audit-log-path=/var/log/kubernetes/audit-logs.txt
3.3 Retain a maximum of 2 log files
- --audit-log-maxbackup=2
3.4 Retain logs for 10 days
- --audit-log-maxage=10
✅ Example (your file may have more flags - that's fine):
- command:
- kube-apiserver
- --audit-policy-file=/etc/kubernetes/logpolicy/audit-policy.yaml
- --audit-log-path=/var/log/kubernetes/audit-logs.txt
- --audit-log-maxbackup=2
- --audit-log-maxage=10
Save and exit:
:wq
The API server will auto-restart (static pod).
Optional quick check:
docker ps | grep kube-apiserver
4) Edit and EXTEND the audit policy
Open the given basic policy:
vi /etc/kubernetes/logpolicy/audit-policy.yaml
The file already contains rules for what NOT to log.
You must ADD rules BELOW them (do not delete existing ones).
5) Add the required audit rules (EXACT ORDER)
Append the following rules in this order (order matters in audit policies).
5.1 Log namespaces interactions at RequestResponse
- level: RequestResponse
resources:
- group: ""
resources: ["namespaces"]
5.2 Log deployment request bodies in namespace webapps
- level: RequestResponse
namespaces: ["webapps"]
resources:
- group: "apps"
resources: ["deployments"]
5.3 Log ConfigMap and Secret interactions (all namespaces) at Metadata
- level: Metadata
resources:
- group: ""
resources: ["configmaps", "secrets"]
5.4 Log all other requests at Metadata
This must be LAST
- level: Metadata
5.5 Final audit-policy.yaml should END like this
# (existing "do not log" rules above)
- level: RequestResponse
resources:
- group: ""
resources: ["namespaces"]
- level: RequestResponse
namespaces: ["webapps"]
resources:
- group: "apps"
resources: ["deployments"]
- level: Metadata
resources:
- group: ""
resources: ["configmaps", "secrets"]
- level: Metadata
Save and exit:
:wq
6) Make sure API server uses the EXTENDED policy
Touch the manifest to guarantee reload:
touch /etc/kubernetes/manifests/kube-apiserver.yaml
Wait a few seconds.
7) Verify auditing is working
7.1 Check audit log file exists
ls -l /var/log/kubernetes/audit-logs.txt
7.2 Generate test activity
kubectl get namespaces
kubectl get configmaps -A
7.3 Confirm logs are written
tail -n 20 /var/log/kubernetes/audit-logs.txt
You should see audit entries.
全 14 ページ中 1 ページ目を表示しています。
全 66 問中 1-5 問目を表示しています。

 -寺岛**


